
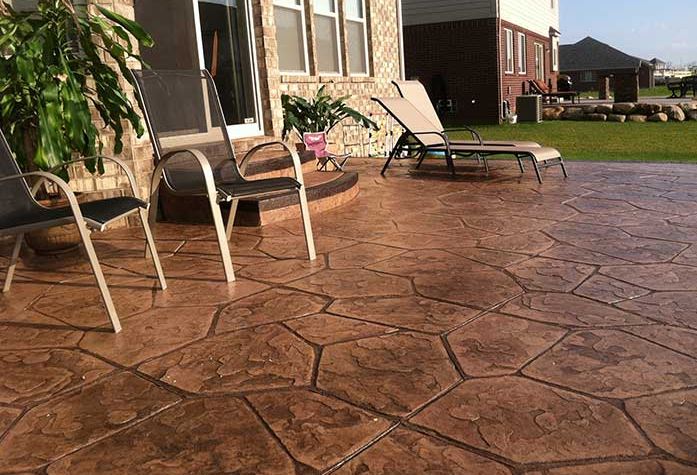
Installing a decorative concrete porch is a great way to improve your home’s aesthetics and even drive up property value. Design possibilities for decorative concrete porches are quite versatile, and you’ll be surprised to find out just how many options you have for texture, color, and pattern. You can truly create something unique that perfectly complements your home.
With some learning, a lot of attention to detail, and the right tools and supplies, it's possible to create your own decorative porch, even if you have limited experience working with concrete.
Continue reading now to learn how!
Table of Contents
1. Determine Your Design
It's important to understand your design goals beforehand, so you know which decorative concrete tools and supplies you will need for the project.
Decorative concrete can be textured, colored, or both. Textures and patterns can be achieved with stamps and mats, and color can be achieved by adding colorants. There are different types of colorants; some are applied to the concrete mix, and others are used on the surface of the concrete. You can read this blog to learn more about the primary types of colorants.
Decorative concrete porches can also be built with a variety of customizable features. So, you'll need to consider whether you want to add exterior amenities like borders, a fireplace or fire pit, an outdoor kitchen, or steps.
If you’re building a new porch (not from an existing slab), continue reading from here. We strongly recommend working with a professional if you don’t have an existing slab—a lot can go wrong during a new build, and expert-level knowledge and experience are indispensable.
If you want to add a texture or a pattern to your existing porch, skip to Step 6. Or, if your goal is to refresh or add color to your existing porch, please skip to Step 7.
2. Level Your Area

The foundation you prepare to pour your concrete slab on is critical to the project's success. You want to spend extra time and effort to create a solid, level area to work on. Here are the basic steps to follow:
- Use wooden stakes and masonry string to mark out the exterior perimeter of the project precisely.
- Clear your work area of debris, roots, rocks, and other obstacles.
- Excavate the grass, soil, and other materials at least six inches deep to ensure a level surface.
- Use a hand tamper or plate compactor to compress the soil thoroughly.
- Add at least four inches of gravel to the compacted soil for proper drainage and stability.
- Top off the gravel with two inches of sand to create a smooth surface on which to pour the concrete slab.
- Finally, use straight edges, line/hand/laser levels, and tampers to ensure your foundation is completely compacted and leveled.
Tools Needed:
- Wooden Stakes
- Masonry String
- Spades, Trowels, or Spades for Excavation
- Hand Tamper or Plate Compactor
- Straight Edges
- Levels
3. Build Porch Walls & Steps
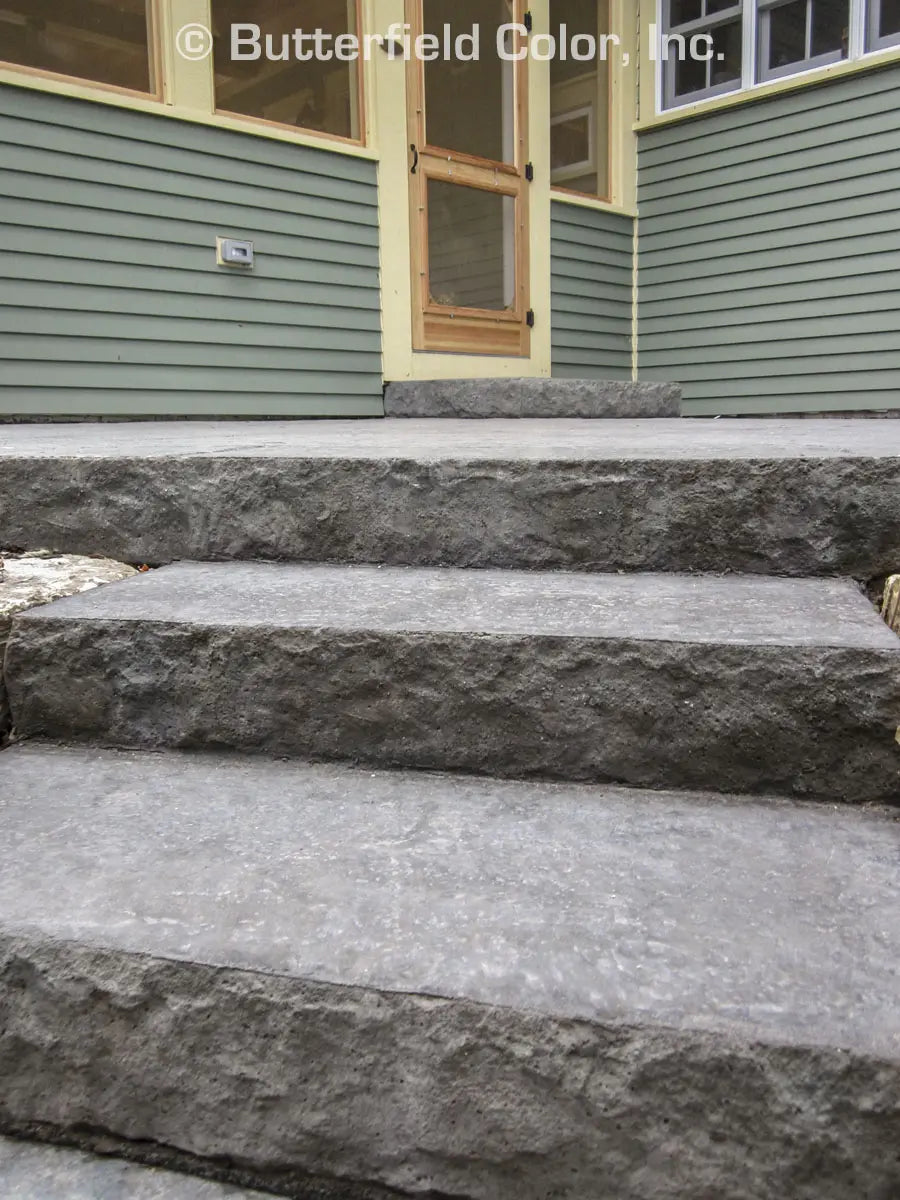
Depending on your design specifics, you may also need to make forms for steps after you build the foundation. Of course, steps are optional, but if that is part of your design, please read this informative article for more in-depth guidance on using step form liners.
Once you are finished setting up your liners, your next step is to construct the walls that your concrete pad will be poured inside. Your porch walls can be made of either poured concrete or masonry bricks. If you pour your walls with concrete, you'll need to build steel or wooden forms first. Make sure that your forms are strong, straight, level, plumb, and unbowed.
Depending on their height, you may need to add rebar to reinforce your walls. After you pour the concrete into the forms, you'll need to use a concrete vibrator to help settle the concrete down and eliminate any air bubbles. Then, you'll need to allow the concrete to set and harden before moving on to backfilling. Please note that setting times will vary based on the concrete mix you used—always consult the manufacturer’s instructions.
Tools Needed:
- Concrete Mix (or Bricks)
- Mixer or Wheelbarrow
- Shovel
- Level
- Concrete Trowel
- Step Form Liners
- Wood or Steel Form Boards for Walls
- Rebar (Optional)
- Concrete Vibrator
- Safety Gear
- Eye Protection
- Rubber Boots
- Gloves
4. Backfill
Once your porch walls are built and hardened, it's time to backfill the interior void they create. Backfilling is a step you don’t want to skip because it helps stabilize and support your porch, ensure proper drainage, and prevent soil erosion.
When backfilling, you can use the original material you removed during excavation, like soil, or another suitable material, like gravel. Avoid using extra bricks or wood because they may cause your concrete pad to settle and crack in the future.
Here are some general tips for backfilling:
- Wait at least 5 to 7 days to backfill any foundation, as this will help avoid future cracking and other damage.
- Ensure the area to be backfilled is completely free of loose stones, grass, debris, or water.
- Install your backfill material in layers, compacting each layer before adding the next.
Once you have backfilled your work area to within four inches of the top of your decorative porch walls, go over it a final time to ensure it is thoroughly compacted and level at all points.
Now you are ready to pour your slab!
Tools Required:
- Backfilling Material (Gravel, Soil, etc.)
- Hand Tampers or Compactors
- Shovel or Excavator
- Level
5. Prepare the Existing Surface or Pour a New Concrete Slab
As mentioned earlier, when creating a decorative concrete porch, you can generally take two routes: use an existing slab or pour a new one.
If you already have a concrete slab in good condition, we recommend going with the first option, as it will be much easier. However, if you don’t have a slab or your existing one is badly damaged, we recommend starting from scratch and pouring a new one.
Upgrading/Restoring an Existing Slab
If you’re upgrading or restoring an existing slab with a stampable overlay, follow these steps:
- Remove existing sealers using a chemical stripper. Getting down to the bare concrete is crucial to ensure the new overlay adheres properly. Please read this article for guidance on removing existing sealer (or colors) from a slab.
- Sweep away debris, dust, and dirt. You can use a pressure washer during this step—we recommend using one if there are oils, grease, or stains on the slab.
- Inspect the surface for uneven areas and use a concrete grinder to smooth rough spots or edges. Your goal here is to ensure the slab is completely even.
- Fill cracks or holes with a concrete patching compound. The filler must be compatible with the overlay material. Smooth out the filler and allow it to dry. Drying time will vary based on the compound you use, so always look at the manufacturer’s instructions.
- You can apply the overlay after the surface is smooth, clean, and even. Follow the manufacturer's instructions on mixing the overlay material. During this step, you will also add a colorant unless you have chosen one that gets applied directly to the concrete surface.
- Use a gauge rake to ensure the overlay is distributed evenly.
- Smooth the overlay with a hand finisher.
Read this article for more information on applying, coloring, and stamping overlays. If you will be adding texture to your slab, do not let the overlay fully dry.
Tools Needed:
- Chemical Stripper
- Broom & Dust Pan
- Pressure Washer or Hose & Mild Soap Solution
- Concrete Grinder
- Concrete Patching Compound
- Mixing Bucket & Paddle
- Trowel
- Gauge Rake
- Hand Finisher
- Safety Equipment
- Gloves
- Goggles
- Face Mask
Pouring a New Concrete Slab
Pouring a new slab is a significant task that requires careful planning, preparation, and execution, so we recommend working with a professional.
First, it’s critical that you choose the right concrete mix for your project—the mix should be appropriate for the slab’s purpose and environmental conditions. There are several mixes you can choose from, including standard (pre-formulated and used for general construction), high-strength (needed for foundations or load-bearing walls), fast-setting (ideal for quick repairs), and lightweight. There is also ready-mix concrete, which is pre-mixed based on the project’s requirements and can be extremely helpful in larger projects where mixing the concrete on-site would be too time-consuming.
If you don't choose ready-mix concrete, it's important to carefully follow the manufacturer's instructions on mixing—poorly mixed concrete can affect the aesthetics and strength of the final product.
After you’ve mixed your concrete (and added any colorants), you’ll pour the concrete into the forms, spreading it evenly. Ensure it fills all corners and edges and is level with the top of the forms.
Once the concrete is poured, smooth the surface with a screed board and use a float to further smooth the surface or use a trowel for a finer finish.
If you will be adding texture to your new slab, do not allow the concrete to fully dry.
Tools Needed:
- Concrete Mix
- Colorant (If Added Directly to the Concrete Mix)
- Concrete Mixer or Mixing Bucket & Paddle
- Wheelbarrow
- Screed Board
- Float or Trowel
- Safety Gear
- Boots
- Gloves
- Eye Protection
- Face Mask
6. Stamping

There are three main types of stamping mats you can use to add patterns or texture to your freshly poured concrete:
- Semi-rigid and rigid stamping mats for flatwork.
- Flex mats (floppies) that can bend around up to 90-degree angles, perfect for awkward areas, including steps.
- Texturing skins that produce seamless surface textures without grout lines.
Whether you've applied an overlay or poured a new slab, you must apply the stamps when the concrete is firm enough to support your weight and the stamp without sinking but still soft enough to take the impression of the stamp. The right time to stamp is typically when the surface no longer feels tacky, and you can press into it without leaving a deep impression. To test, press your finger onto the concrete surface; if it leaves a slight imprint, it's usually ready for stamping.
Stamping takes time and patience, and should always be delayed if it’s too windy or if rain is in the forecast. Please read this guide for a detailed outline of how to stamp concrete.
Tools Needed:
- Concrete Release
- Stamps & Mats
- Mason Brush
- Tamper
- Brush-up Wheel
- Evaporation Retardant
- Safety Gear
- Gloves
- Boots
- Goggles/Eye Protection
- Dust Mask
7. Color the Concrete

As mentioned earlier, there are several types of concrete colorants you can choose from.
If your slab has already been poured and allowed to cure, your only option is to apply a topical concrete stain. When pouring a new slab or overlay, you can add integral colors and dyes to the concrete mix before it’s poured. You can also opt for dry-shake color hardeners or other powdered colorants that can be applied to the surface (after stamping) before it dries.
Please always follow the manufacturer’s instructions for adding color to the concrete mix or applying powdered colorants to the surface.
8. Cure & Seal!

When you’ve added texture, patterns, and/or color, the next step is to let the concrete dry and cure, then seal it. Sealing is crucial, as it helps protect the slab from oil, grease, water, chemicals, abrasion, and weather damage.
Cure times will vary based on the type of concrete mix used and environmental conditions. The manufacturer’s instructions for your concrete mix should list the average cure time. It's also important to mention that the curing time will increase if the relative humidity is high.
After the concrete has cured, you can also remove any wall and step forms.
The basic steps of sealing concrete include:
- Removing dust and debris and thoroughly cleaning the surface.
- Applying an etching solution.
- Applying a first thin coat of concrete sealer with either a sprayer or roller.
- Allowing the first coat to completely dry according to the manufacturer’s instructions.
- Applying the second coat of sealer in the opposite direction to the first coat.
- Allowing the second coat of sealer to completely dry before walking on it or otherwise using it.
Although it may seem very straightforward, curing and sealing concrete can be tricky in some cases. Please read this article if you'd like more tips and tricks on applying concrete sealers. And if you need guidance on selecting the best concrete sealer for your project, you can learn everything you need here.
Get the Decorative Concrete Supplies You Need Today
Are you ready to build your porch? Get what you need from Stamped Concrete Supplies. We sell all types of decorative concrete supplies and tools, including sealers, colorants, stamps, trowels, tampers, and more.
Please visit our website to view our complete inventory, and if you need help selecting the right tools and products for your project, don’t hesitate to contact our pros. We’re always here and happy to help!


